chen-001/dsh-grok-tui
把 grok-build 的 TUI 作为 DeepSeek Harness (dsh) 的前端:界面是 grok 的,内核(提示词、工具、模型路由、会话持久化)由 dsh 提供。
catalog 简介 / catalog descriptioncatalog description:Use dsh via grok-build's TUI.
项目介绍Project Overview
dsh-grok-tui 是 DeepSeek Harness (dsh) 的客户端插件,将 grok TUI 界面与 dsh 内核(提示词、工具、模型路由、会话持久化)桥接。安装时通过 grok-dsh setup 把 grok-server 写入 dsh profile,随后运行 grok-dsh 即可直连运行中的 dsh web,或启动独立后端。运行所在目录即会话工作目录。适用于希望复用 grok TUI 操作体验,同时使用 dsh 引擎与用量指标(缓存命中率、TTFT、TPS)的用户。在 herdr 或 tmux 中可显示完整指标。注意:独立后端与 dsh web 不应同时运行,二者会写入同一会话存储。
dsh-grok-tui is a DeepSeek Harness (dsh) client plugin that bridges the grok TUI interface with the dsh engine (prompts, tools, model routing, session persistence). After installing, grok-dsh setup wires the grok bridge into the dsh web profile; running grok-dsh then connects to a running dsh web host or starts a standalone backend. The launch directory becomes the session working directory. It targets users who want the grok TUI experience backed by dsh's engine and usage metrics (cache hit rate, TTFT, TPS). Full metrics display automatically in herdr or tmux. Caveat: do not run a standalone backend while dsh web is active, as both write to the same session store.
请帮我了解并安装插件:【dsh-grok-tui】【https://github.com/chen-001/dsh-grok-tui】把上面这条消息直接发给当前会话里的 DSH,让它帮你了解并安装。安装命令不一定准确,发给 DSH 更稳。Send this message to DSH in your current session. CLI install commands may not be accurate across systems — DSH will figure it out for you.
或使用命令行安装(适合开发者)Or use CLI install (for developers)
命令行安装CLI Install
dsh plugin --profile web add github:chen-001/dsh-grok-tui把 chen-001/dsh-grok-tui 加入你的 DSH 配置(web profile)即可启用。
READMEREADME
dsh-grok-tui
把 grok-build 的 TUI 作为 DeepSeek Harness (dsh) 的前端:界面是 grok 的,内核(提示词、工具、模型路由、会话持久化)由 dsh 提供。
Grok's TUI as a frontend for DeepSeek Harness (dsh): the interface is grok's, the engine (prompts, tools, model routing, persistence) is dsh's.
安装 / Installation
前提:已安装 dsh 与 grok TUI 二进制(curl -fsSL https://x.ai/cli/install.sh | bash)。支持 macOS / Linux。
Prerequisites: dsh and the grok TUI binary (curl -fsSL https://x.ai/cli/install.sh | bash). macOS / Linux.
方式 A:npm 发布版 / Published npm package
npm install -g dsh-grok-tui
grok-dsh setup        # 把 grok bridge 挂进 dsh web 的 profile(幂等,可重复执行)
                      # wire the grok bridge into the dsh web profile (idempotent)
npx @deepseek-ai/dsh web   # 启动官方 host / start the official host
grok-dsh              # 打开 TUI,直连运行中的 dsh web
                      # open the TUI, bridging to the running dsh web
grok-dsh setup 是显式的(npm 全局安装不会静默改写你的 dsh 配置):它把 grok-server 行写进 ~/.dsh/profiles/web/cordis.patch.yml 并把插件软链进 profile 的 node_modules,npx @deepseek-ai/dsh web 随之携带 leader socket。host 已在运行时重装后需重启一次。
grok-dsh setup is explicit (a global install never silently rewrites your dsh config): it adds the grok-server row to ~/.dsh/profiles/web/cordis.patch.yml and links the plugin into the profile's node_modules, so npx @deepseek-ai/dsh web carries the leader socket. Restart the host once if it is already running.
方式 B:git 完整安装 / Full installer
git clone https://github.com/chen-001/dsh-grok-tui.git
cd dsh-grok-tui && sh install.sh
This installer performs the same bridge hookup automatically, then builds and writes the grok-dsh launcher into your PATH.
两种方式安装后的行为完全一致(命令、herdr 侧栏自动配置、用量面板)。
Both paths behave identically afterwards (command, automatic herdr sidebar config, usage panels).
使用 / Usage
先启动官方 host(推荐),再打开 TUI:
Start the official host first (recommended), then open the TUI:
dsh web                # 启动官方 host / start the official host
grok-dsh               # 打开 TUI:检测到运行中的 dsh web 则直连,否则启动本窗口独立后端
                       # open the TUI: bridges to a running dsh web, else starts a per-window backend
grok-dsh stop          # 停止所有独立后端 / stop all standalone backends
grok-dsh status        # 查看 host 桥 / 独立后端状态与 grok 版本 / host bridge & backend status, grok version
grok-dsh restart       # 重启当前窗口的独立后端 / restart this window's standalone backend
在哪个目录运行 grok-dsh,会话的工作目录就在哪个目录。独立后端与 dsh web 不要同时运行(两者写同一会话存储)。
Run grok-dsh in the directory you want the session's working directory to be. Do not run a standalone backend while dsh web is up (both write the same session store).
用量指标展示 / Usage metrics
官方 grok 二进制即可显示 token 用量(状态栏 18K/1.0M context bar)。完整指标——缓存命中率、TTFT、TPS、输入/输出 token——在以下环境自动展示,无需编译任何 grok 源码:
The stock grok binary already shows token usage (the 18K/1.0M context bar). Full metrics — cache hit rate, TTFT, TPS, in/out tokens — appear automatically in these environments, no grok source build needed:
推荐:在 herdr 中使用 / Recommended: inside herdr
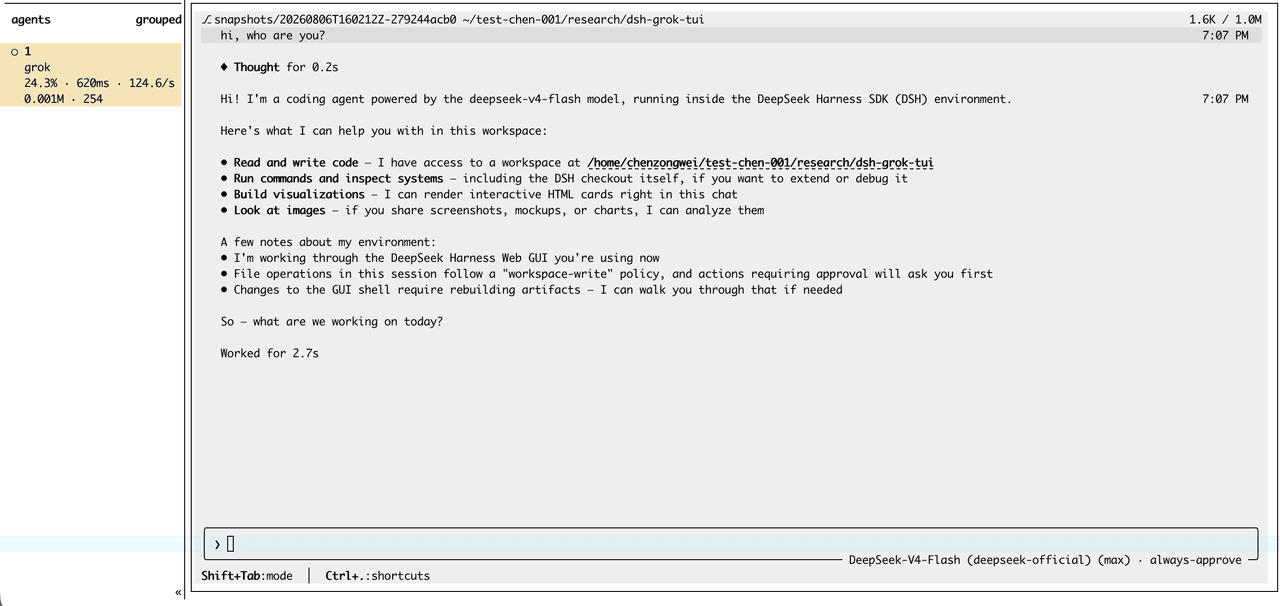
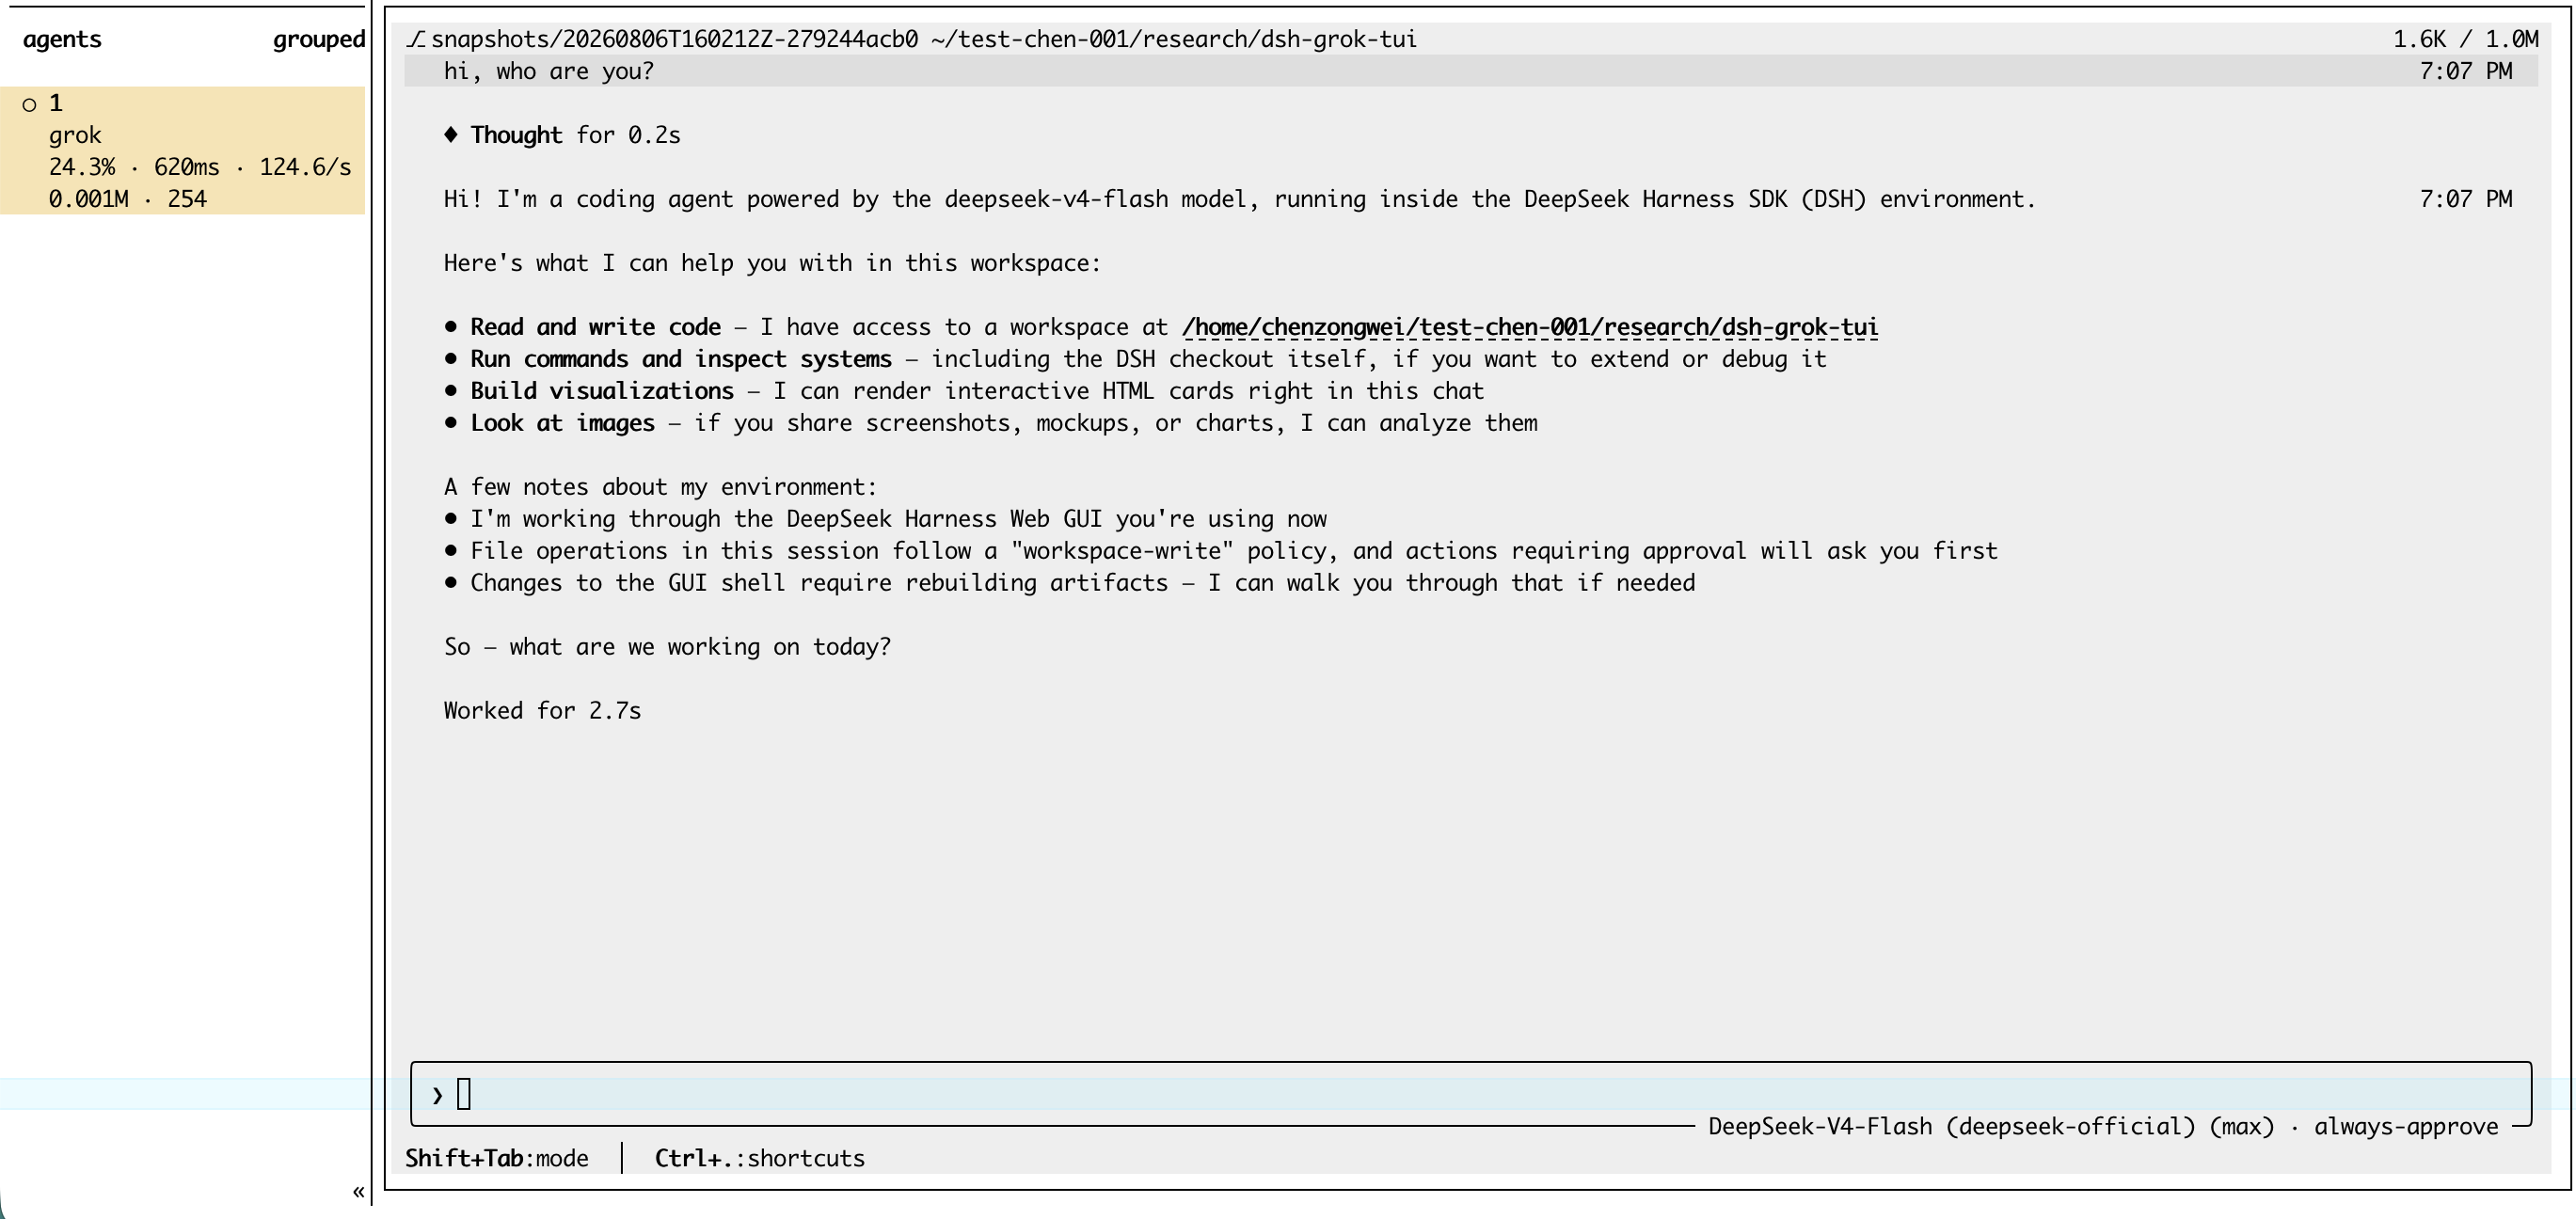
在 herdr 的 pane 里运行 grok-dsh,指标实时显示在左侧 agents 列表的 grok 条目下(herdr 侧栏配置由安装自动完成,重启 herdr 或 reload config 后生效):
Run grok-dsh inside a herdr pane and the metrics appear live under the grok entry in the agents list (herdr sidebar config is installed automatically; reload herdr or its config to pick it up):
| token | 内容 / Metric | 示例 / Example |
|---|---|---|
dsh_cache |
缓存命中率 / cache hit rate | 99.6% |
dsh_ttft |
平均首 token 延迟 / avg time-to-first-token | 0.8s |
dsh_tps |
平均输出速率 / avg output tokens/s | 204.1/s |
dsh_in / dsh_out |
累计输入/输出 token / cumulative in/out tokens | 64 / 175 |
在 tmux 中使用 / Inside tmux
在 tmux 里运行 grok-dsh 会自动在 TUI 下方开一个用量面板窗格(按 q 关闭):
Running inside tmux auto-opens a usage panel below the TUI (press q to close):
╭─ dsh usage ─────────────────────╮
│ cache hit     99.6%  (18.0K read) │
│ input            64 tokens       │
│ output          172 tokens       │
│ total         18.1K tokens       │
│ api calls           1            │
│ tool time        0.0s            │
╰─────────────────────────────────╯
相关推荐Related
-
 nexu-io/open-design
🎨 Best DeepSeek Harness Design Plugin. The open-source Claude Design alternative. 🖥️ Local-first desktop app. 🖼️ Your…
nexu-io/open-design
🎨 Best DeepSeek Harness Design Plugin. The open-source Claude Design alternative. 🖥️ Local-first desktop app. 🖼️ Your…
-
 ruvnet/ruflo
🌊 The original agent meta-harness. Deploy intelligent multi-player swarms, coordinate autonomous workflows, and build c…
ruvnet/ruflo
🌊 The original agent meta-harness. Deploy intelligent multi-player swarms, coordinate autonomous workflows, and build c…
-
 amruthpillai/reactive-resume
A one-of-a-kind resume builder that keeps your privacy in mind. Completely secure, customizable, portable, open-source a…
amruthpillai/reactive-resume
A one-of-a-kind resume builder that keeps your privacy in mind. Completely secure, customizable, portable, open-source a…
-
 esengine/DeepSeek-Reasonix
DeepSeek-native AI coding agent for your terminal. Engineered around prefix-cache stability — leave it running.
esengine/DeepSeek-Reasonix
DeepSeek-native AI coding agent for your terminal. Engineered around prefix-cache stability — leave it running.
-
 volcengine/OpenViking
Self-evolving Context Database for AI Agents. Unify Agent Memory, Knowledge RAG and Skills.
volcengine/OpenViking
Self-evolving Context Database for AI Agents. Unify Agent Memory, Knowledge RAG and Skills.
-
 Molunerfinn/PicGo
:rocket: The Ultimate Image Uploader for Efficient Creators. Supports Obsidian, Typora, VS Code etc. and 60+ image hosti…
Molunerfinn/PicGo
:rocket: The Ultimate Image Uploader for Efficient Creators. Supports Obsidian, Typora, VS Code etc. and 60+ image hosti…
-
 titanwings/distilly
Distilly — Distill how they think into reusable Skills for any Agent or Bot. Formerly Colleague Skill(原同事 Skill).
titanwings/distilly
Distilly — Distill how they think into reusable Skills for any Agent or Bot. Formerly Colleague Skill(原同事 Skill).
-
 titanwings/colleague-skill