blackteaYES/dsh-thinking-levels-settings
面向自定义DSH llm-pi-ai提供商的按模型思考级别设置页面(官方DSH客户端插件形式)
Project Overview项目介绍
A DSH client plugin that adds a Thinking Levels section to the settings page, letting users assign one of seven reasoning tiers (off, minimal, low, medium, high, xhigh, max) to each model of custom llm-pi-ai providers, with preset mappings for DeepSeek, OpenAI, and Grok. Configuration is written via the official Settings wire into ~/.dsh/settings.yaml. A custom llm-pi-ai provider must already be configured, otherwise the page shows a not-loaded state. Upgrading from versions 2.0 or earlier requires manual cleanup of stale profile dependencies.
DSH 插件,为设置页的「思考级别」新增独立分节,可为自定义 llm-pi-ai 提供商的每个模型单独配置 7 档推理档位(off/minimal/low/medium/high/xhigh/max)及 DeepSeek、OpenAI、Grok 三套预设映射,通过官方 Settings wire 写入 ~/.dsh/settings.yaml 的 reasoningEfforts,表格支持勾选与撤销/保存。需提前配置好自定义 llm-pi-ai 提供方;旧版升级须先清理被污染的 profile 残留依赖。
请帮我了解并安装插件:【dsh-thinking-levels-settings】【https://github.com/blackteaYES/dsh-thinking-levels-settings】Send this message to DSH in your current session. CLI install commands may not be accurate across systems — DSH will figure it out for you.把上面这条消息直接发给当前会话里的 DSH,让它帮你了解并安装。安装命令不一定准确,发给 DSH 更稳。
Or use CLI install (for developers)或使用命令行安装(适合开发者)
CLI Install命令行安装
dsh plugin --profile web add github:blackteaYES/dsh-thinking-levels-settings#master把 blackteaYES/dsh-thinking-levels-settings 加入你的 DSH 配置(web profile)即可启用。
READMEREADME
dsh-thinking-levels-settings

给 DSH Web 的 设置 → 思考级别 新增一页:为自定义 llm-pi-ai 提供商的每个模型配置
thinking levels(推理档位) —— off / minimal / low / medium / high / xhigh / max,
通过官方 Settings wire 持久化到 ~/.dsh/settings.yaml(llm-pi-ai.providers.*.models[*].reasoningEfforts)。
官方 client-plugin 形态(DeepSeek Harness 插件系统的自定义插件)。
✨ 功能
- 按模型配置:为每个模型单独设置推理档位(档位词表从 DSH settings schema 发现,内置 Off…Max 回退)
- 预设档位:DeepSeek / OpenAI / Grok 三套协议的预置映射(按当前可用档位取子集)
- 表格编辑:勾选启用、输入框改协议值,按模型保存(带 revision 冲突检测)
- 持久化:写入
~/.dsh/settings.yaml,重启后保留 - 组件化:作为
settings.section槽位贡献注册,挂在设置页「思考级别」分节
📦 安装
先安装 pnpm(方式 A / B 的前置要求)
先检查是否已有 pnpm:
pnpm --version
没有 pnpm 时,优先使用 Node.js 自带的 Corepack:
corepack enable
corepack prepare pnpm@latest --activate
pnpm --version
如果系统没有 corepack,可通过 npm 安装:
npm install --global pnpm
pnpm --version
确认 dsh 能在同一环境的 PATH 中找到 pnpm:
command -v pnpm
WSL 用户必须在 WSL 发行版内部执行上述命令;只在 Windows 主机安装 pnpm,不保证 WSL 中的
dsh plugin能找到它。若无权限全局安装,使用 Corepack,或直接选择方式 C。
方式 A:#master 直装(推荐,最简;需要 dsh CLI + pnpm)
dsh plugin --profile web add github:blackteaYES/dsh-thinking-levels-settings#master
master 分支由 CI(.github/workflows/ci.yml)自动维护为预构建产物分支——只含 lib/
与包元数据,不含源码、没有 prepare 脚本,安装即用:
- 无需本地构建,pnpm ≥10 也不再需要
allowBuilds构建授权 - 合并到 main 后自动更新;之后
dsh plugin --profile web update即升级到最新构建 - 如遇
ERR_PNPM_ADDING_TO_ROOT,加-w:dsh plugin --profile web add -w github:blackteaYES/dsh-thinking-levels-settings#master
想锁定确定版本、避免「最新即变」?用方式 B 的 Release tarball(不可变的版本锚点)。
方式 B:Release tarball 安装(稳定通道,版本可锁定;需要 dsh CLI + pnpm)
从 Releases 下载
dsh-thinking-levels-settings-<version>.tgz,或直接用直链一步安装:
dsh plugin --profile web add https://github.com/blackteaYES/dsh-thinking-levels-settings/releases/download/v2.2.0/dsh-thinking-levels-settings-2.2.0.tgz
- 自动加入
dsh.profile.bundles(reconcile 识别dsh.bundle) - 无需手动编辑任何文件,无需构建授权
- 完成后重启 dsh,浏览器硬刷新(Ctrl+Shift+R)
tarball 由 CI 在打 v* tag 时自动构建并附加到 Release(.github/workflows/release.yml)。
方式 C:一键脚本(无 pnpm 环境)
解包后运行:
tar -xzf dsh-thinking-levels-settings-2.2.0.tgz -C /tmp/rel
cd /tmp/rel/package
bash install.sh            # 默认 profile: web;DSH_PROFILE=xxx 可指定
脚本自动检测:有 dsh+pnpm 走官方路径(dsh plugin add,失败自动 -w 重试),否则手工路径(复制包目录 +
package.json 注入 file: 依赖 + cordis.patch.yml 追加挂载行)。幂等,可重复运行。
方式 D:手工(与官方 client 插件同构)
# 1) 包目录 -> ~/.dsh/profiles/web/packages/dsh-thinking-levels-settings/
# 2) profile package.json 添加依赖:
#    "dsh-thinking-levels-settings": "file:./packages/dsh-thinking-levels-settings"
# 3) cordis.patch.yml 追加:
#    - insert:
#        - id: ui-thinking-levels-settings
#          name: dsh-thinking-levels-settings
# 4) cd ~/.dsh/profiles/web && npm install --package-lock=false --ignore-scripts
# 5) 重启 dsh web,硬刷新浏览器
完整安装/导出/验证/卸载教程见 INSTALL.html(图文)与 INSTALL.md(文字版)。
从 ≤2.0 旧版升级:先清理被污染的 profile
2.0 及更早版本把 @deepseek-ai/* 声明为普通 dependencies,pnpm 安装时会往 profile 里物化
一套旧版本副本,遮蔽 dsh 本体提供的模块,导致 所有对话报
history unavailable for session "...": TypeError: Cannot read properties of undefined (reading 'parse')
等新旧版本混跑故障。升级到 2.1+ 前请先清理一次:
cd ~/.dsh/profiles/web
dsh plugin --profile web remove dsh-thinking-levels-settings   # 或 pnpm remove dsh-thinking-levels-settings
然后核对三处残留:
~/.dsh/profiles/web/package.json:dependencies与dsh.profile.bundles数组里都不应再有dsh-thinking-levels-settings(remove不会动 bundles 字段,需手工删)ls ~/.dsh/profiles/web/node_modules/@deepseek-ai—— 应不存在或为空。若还有真实目录 (非符号链接),它们是旧插件拖入的副本,整棵删掉:rm -rf ~/.dsh/profiles/web/node_modules/@deepseek-ails ~/.dsh/profiles/web/node_modules | grep -E '^(zod|immer|zustand|fflate)$'同为旧版拖入的残留则一并删除(宿主自己的依赖在上一级~/.dsh/profiles/node_modules, 是指向安装的符号链接,不受影响)
清理完成后重启 dsh web,再按方式 A / B 安装 2.2+。2.1 起宿主包改为 optional peerDependencies,2.2 起 不再声明任何 @deepseek-ai 包(dev/peer 全无),任何环境都不会再物化副本。
🧩 前提
- DSH(DeepSeek Harness)Web 任意近版本(见下「版本兼容」)
- profile 里配置了自定义
llm-pi-ai提供方(否则页面提示「没有找到可编辑的提供方」) - 方式 A / 方式 B 需要本机有 pnpm(
dsh plugin是 pnpm 转发器)
🧭 版本兼容(不写死平台契约)
本插件曾在 rc.6 → rc.2 升级中失效,原因是三处写死的平台契约:dsh.client.inject
里的包名、ctx.connection.api 服务键、{result:{ok}} 响应信封。当前版本改为:
- settings 通道运行时探测:按
remote.settings → api.settings → connection.api.settings与describe/getSettings → mutate/mutateSettings的候选名逐个探测,能返回带命名空间列表的 文档才算命中;信封支持{ok,value|error}/{result:{…}}/{success,data}/ 裸文档。 - 调用形状回退:先按现行
mutate(ns, ops, rev)位置参数,失败且属装配错误时回退旧版mutate({ns, ops, expectedRevision});业务失败(冲突/校验)绝不换形重试,避免双写。 - 档位词表从 settings schema 发现:读取
reasoningEfforts键联合节点;发现失败时回退内置off/minimal/low/medium/high/xhigh/max。DSH 以后加档位无需升级本插件。 - 写入语义白名单:只调用以 ops 为第二参数的
mutate;update/replace的第二参数是整段 section,语义不同,绝不作为候选(防脏写)。 dsh.client.inject只作为到达顺序提示(loader 对未知名静默跳过,服务本身靠 ctx.get 探测)。- 硬依赖只剩
slots(官方插件也这么用,且 fiber 停在 pending 时 boot 有明确报错)。
升级 DSH 后通常无需重装本插件;若页面显示错误面板,括号里会标出实际命中的 settings 通道, 便于对照此处候选表补充。
🚀 开发
npm install        # 安装 tsdown / typescript / react 类型(无平台运行时依赖)
npm run bundle     # 构建: tsdown 产出 lib/ + tsc 产出 lib/types
npm run watch      # 开发模式: 自动重建
开发者路径:想直接从源码安装到 profile(git 直装
main,pnpm 会在本机跑prepare构建), 需按 pnpm ≥10 提示在~/.dsh/profiles/web/pnpm-workspace.yaml配置allowBuilds授权。 官方依据:从 GitHub 安装:构建脚本这道坎。 普通用户请使用方式 A / B 的预构建产物,无需任何授权。
结构:
src/index.ts        # node 半入口(空 apply,纯 UI 页)
src/client/index.ts # 浏览器半: settings.section 槽注册 + 设置页组件 + CSS
src/client/settings-wire.ts # 版本容错 settings 通道(纯逻辑,可独立测试)
src/invariant.ts    # invariant companion(包所有权注册)
tsdown.config.ts    # 官方 tsdown.client.ts 形态(clientBundle + node twin)
lib/                # 构建产物(npm run bundle 生成)
cordis.patch.yml   # 一行 patch 模板(dsh.bundle 引用它)
release.sh          # 一键产出 npm pack 形态发布包 .tgz
install.sh          # 一键安装脚本(双路径)
📤 发布新版本
推送 v<version> tag 即可,CI 自动构建并把 .tgz 附到 GitHub Release(release.yml):
git tag v2.2.0 && git push origin v2.2.0
本地出包仍可用 bash release.sh。
🙌 致谢
- @Dave-12138 —— CI 自动构建发布方案与宿主包 peer 化(#1)
📄 License
MIT
Related相关推荐
- Nagi-ovo/voyager Enhancement suite for Gemini, AI Studio, Claude & ChatGPT — plus a prompt manager for any websites, DeepSeek Harness inc…
-
 crafter-station/petdex
A public gallery of animated pets for Codex, Claude Code, DeepSeek Harness, Hermes, OpenCode, Gemini CLI, and more.
crafter-station/petdex
A public gallery of animated pets for Codex, Claude Code, DeepSeek Harness, Hermes, OpenCode, Gemini CLI, and more.
-
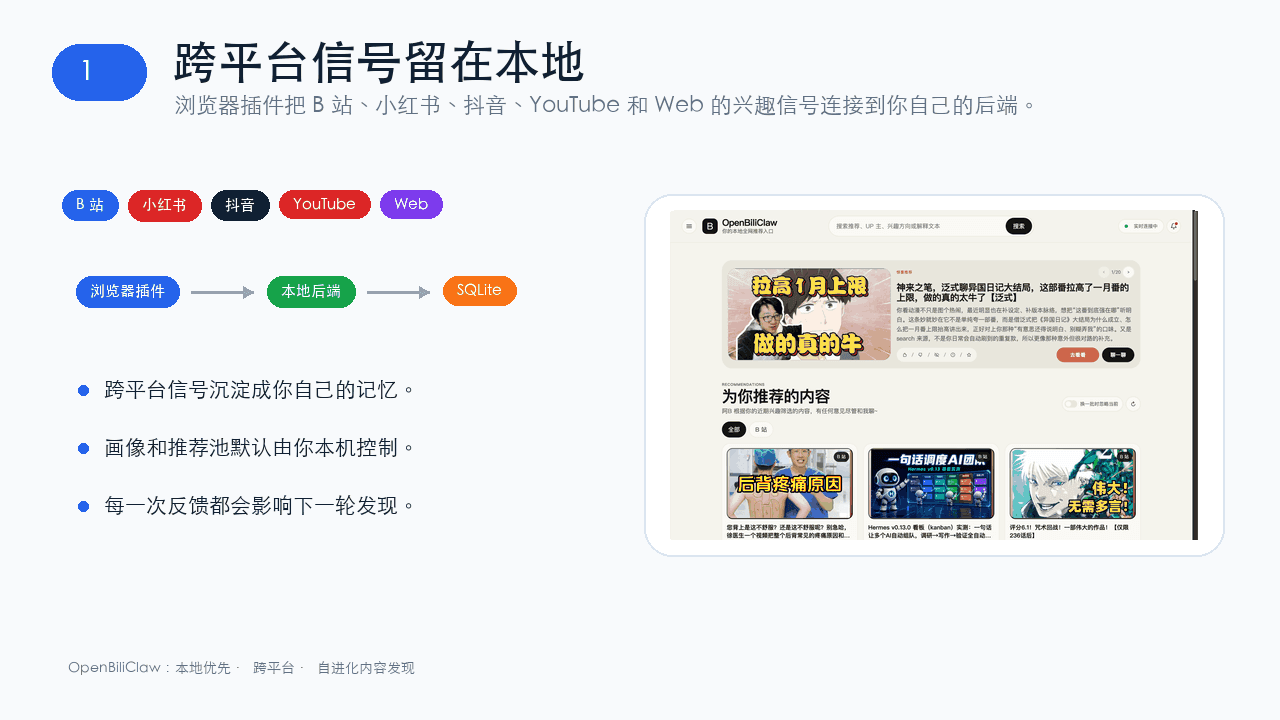 whiteguo233/OpenBiliClaw
本地私有、开源的自进化跨平台 AI 内容发现 Agent:先理解你,再主动从 B站、小红书、抖音、YouTube、X、知乎、Reddit、微博等平台与开放 Web 寻找内容。(支持 deepseek harness 插件) | Local-…
whiteguo233/OpenBiliClaw
本地私有、开源的自进化跨平台 AI 内容发现 Agent:先理解你,再主动从 B站、小红书、抖音、YouTube、X、知乎、Reddit、微博等平台与开放 Web 寻找内容。(支持 deepseek harness 插件) | Local-…
-
 edison7009/EchoBird
One-click install + model switch:Claude Code,Codex CLI (OpenAI), Grok Build (xAI), DeepSeek Harness, Kimi Code (Moonshot…
edison7009/EchoBird
One-click install + model switch:Claude Code,Codex CLI (OpenAI), Grok Build (xAI), DeepSeek Harness, Kimi Code (Moonshot…
-
 V1ki/dsh-plugin-subscriptions
Use ChatGPT (Codex), Claude, and Grok (X Premium) subscriptions as DeepSeek Harness LLM providers — OAuth login in the w…
V1ki/dsh-plugin-subscriptions
Use ChatGPT (Codex), Claude, and Grok (X Premium) subscriptions as DeepSeek Harness LLM providers — OAuth login in the w…
-
 Nwflower/dsh-chat-import
Import 14+ external agent chat histories (Claude Code, Codex, ChatGPT, Cursor, Gemini, Reasonix, opencode, ZCode, Grok B…
Nwflower/dsh-chat-import
Import 14+ external agent chat histories (Claude Code, Codex, ChatGPT, Cursor, Gemini, Reasonix, opencode, ZCode, Grok B…
-
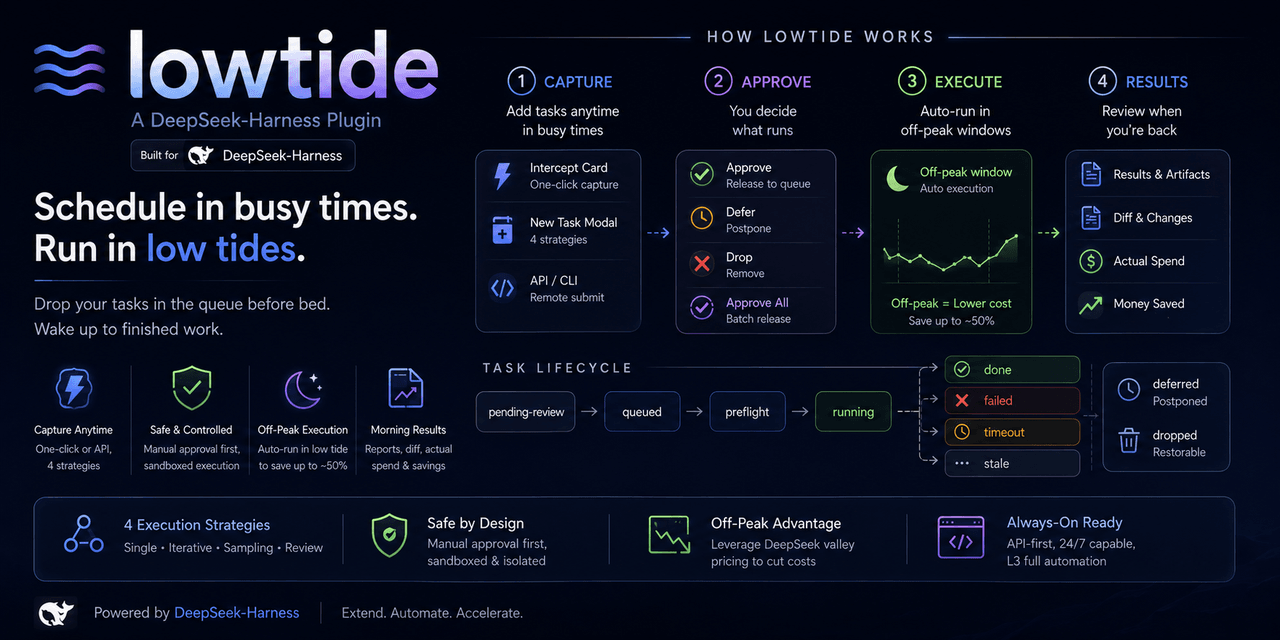 KelaoHu/dsh-lowtide
Time-shifting task delegation for DeepSeek Harness (dsh): plan tasks at leisure, they run unattended off-peak, come back…
KelaoHu/dsh-lowtide
Time-shifting task delegation for DeepSeek Harness (dsh): plan tasks at leisure, they run unattended off-peak, come back…
-
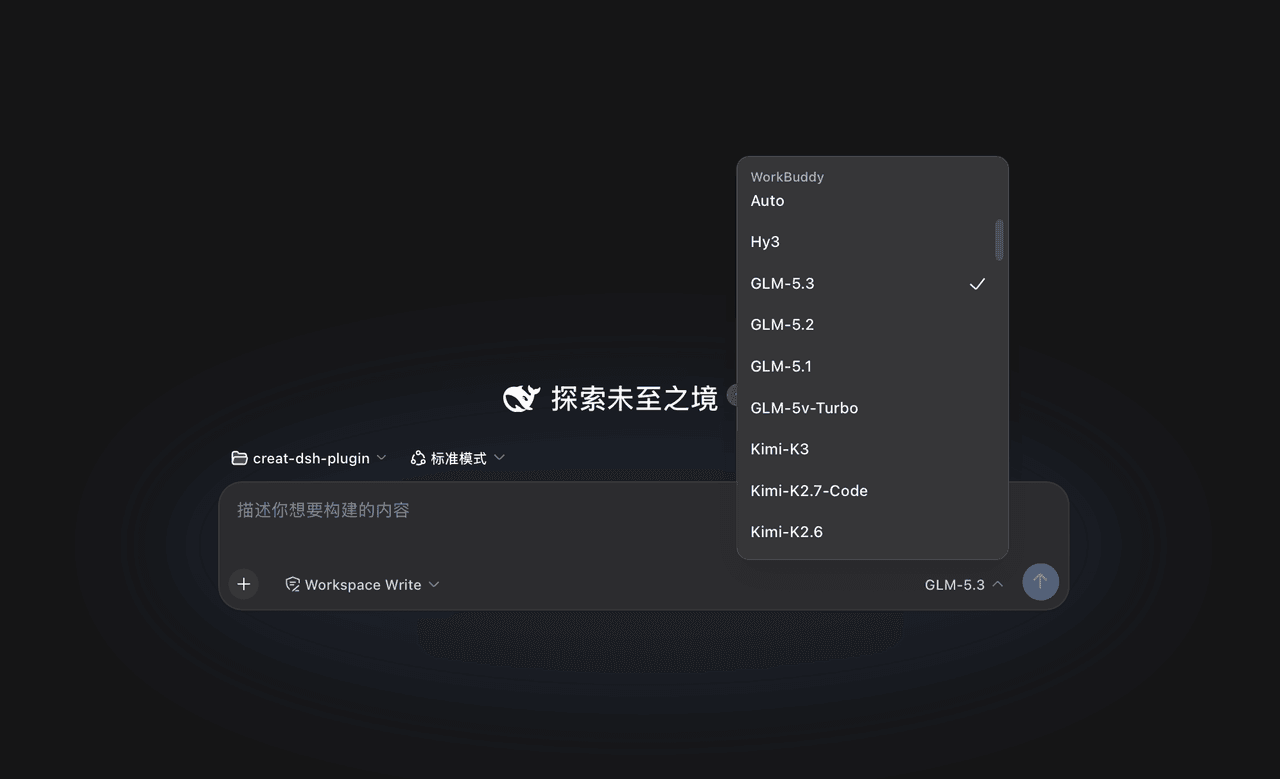 corrinehu/dsh-workbuddy-connect
将 WorkBuddy 桌面 App 包含的模型自动接入 DeepSeek Harness,零配置使用。Bring the models in the WorkBuddy desktop app into DeepSeek Harness …
corrinehu/dsh-workbuddy-connect
将 WorkBuddy 桌面 App 包含的模型自动接入 DeepSeek Harness,零配置使用。Bring the models in the WorkBuddy desktop app into DeepSeek Harness …